Sunday, August 31, 2008

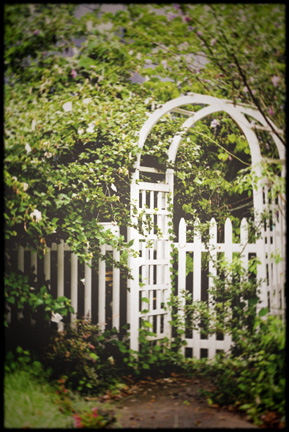
Secret Garden


focal length: 50mm
aperture: f 3.2
shutter speed: 1/640th
ISO: 1600
I could have turned the ISO down and used a slower shutter speed, but I wanted a grainy look.


focal length: 50mm
aperture: f 3.2
shutter speed: 1/160th
ISO: 800

"Where you tend a rose, my lad, a thistle cannot grow."
-Francis Hodgson Burnett
The Secret Garden

Saturday, August 30, 2008

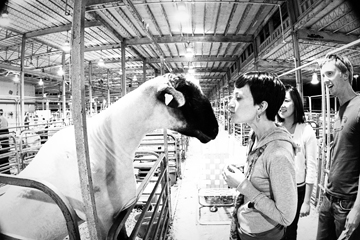
So the sheep says to me...


Focal length: 15mm
Shutter speed: 1/30th
Aperture: f 5.6
ISO: 1600


This sheep was really intent on getting close to Sonja. I can't help but think that it looks like they are having a very serious conversation. I'm trying to include more technical information on my photos, so that's what all the gibberish under the pictures is. and if you've been reading the photography posts, maybe it will even make some sense.

These are a few more pictures left over from the fair that I quite liked but never got around to blogging. Usually I really like to wander the animal barns taking ridiculous numbers of pictures I will never do anything with and making a mental list of all the animals I want to have when I grow up. (My farm will be very Noah's Ark-esque, I fear.) But this time, I ran out of daylight, and so missed most of the large animal barns.

Focal length: 50mm
Shutter speed: 1/125th
Aperture: f 2.5
ISO: 1600

We did, however, get to wander through the rabbit and poultry buildings. I have to say, the smell of chickens is a very distinct aroma, and one that is tied to strong childhood memories for me. Assuming that we do eventually end up with some property in the country, I would definitely like to have a few around. I am especially fond of the shiny black ones and the barred rocks, which have black and white stripes.

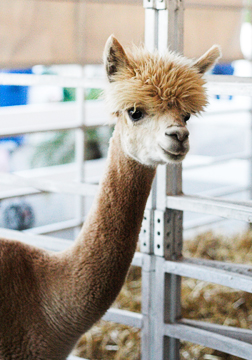
Focal length: 50mm
Shutter speed: 1/800th
Aperture: f 2.5
ISO: 1600

There was also a pretty sweet petting zoo, in which you could buy a cup of carrot slices for like two dollars and then feed all manner of ungulates while trying not to lose a finger. My particular favorites are the camels and the goats with droopy ears. And of course the alpacas, which we'd also like to have someday. (An idea that has been met with much laughter from my family for some reason...)

Wednesday, August 20, 2008

hallelujah...

praise jeebus, i'm finally done. if you've been reading this blog for a while, or if you've read back through my archives (or if you're my family who's heard me bitching "what was i thinking") you may know that last october i got the brilliant idea to knit a wrap for each of my bridesmaids.

i found a lovely fallish orange lace weight yarn (read: very fine yarn that requires billions of stitches to attain a size of any value) and picked out a pattern. roughly two months later, the first wrap was done. then i decided it would probably be a good idea to knit each wrap as a different pattern or i'd want to kill myself before i finished four identical knitted objects so wrap 2 and wrap 3 slowly but steadily came into existence.

wrap 4 was hard on me. i found a pattern i liked and i started it, no fewer than 6 times. it wasn't difficult really, i just made dumb mistakes, and it draaaaaagged on. i never even made it past the fifteenth row, i just couldn't do it and finally i gave up. (though i held on to the pattern,in the hopes that it would work better another time. it was pretty, after all.) while perusing a yarn shop in Asheville in June, i came across a gorgeous lace baby blanket pattern.

Eureka!! tweak the stitch count a bit, make it longer and it would be perfect for a wrap, i thought. i cast on that weekend and never looked back.

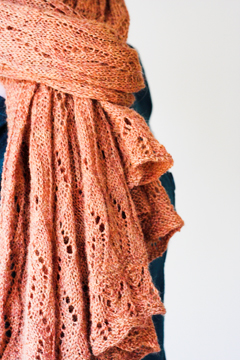
i have to be honest, i love the way this picture turned out.

I finished knitting it last night and was almost late for work this morning because i was blocking it. The pattern has points on the end, but i didn't pin them out so instead of points, i have sort of a wavy edge. The more pointed edges are pretty, but i thought something more subtle would blend better with the other wraps.


why hasn't anyone told me that when i tuck my hair behind my ears i look like an elf?? and not in the good "orlando bloom smokin' hot elf" kinda way.


its very difficult to take a picture of yourself, even with a tripod. especially if the battery in your remote shutter button is dead. and while the natural light in the bedroom was lovely, it wasn't very bright so the pictures turned out quite grainy. (have i mentioned that i heart my fisheye?? i want to marry it.)


this is just a closeup of the edge. the provisional cast on worked out nicely and i am quite pleased with the edging in the pattern. in spite of all my grumbling about being tired of knitting miles of orange lace, the results really are pretty. and i overestimated how much yarn i would need so i have plenty left. i may even make myself one in the future as they make lovely, soft scarves.

Tuesday, August 19, 2008

fun with post processing

i'm not going to lie, i love post processing. i know there are realists out there who think doing any photoshop at all is cheating... that a good photographer doesn't have to edit. no disrespect, but what do you think ansel adams was doing in the dark room??? dicking around with his exposures, no doubt. just because the darkroom has also gone digital doesn't make it cheating. but whatever, to each their own.

in my humble opinion, i've never come across a picture that didn't benefit from just a little tweaking. now, don't get me wrong, its easy to go too far. sometimes you just need to bump up the contrast for a little more oomph. not every photo benefits from tons of processing.

but sometimes it is fun to mess around.


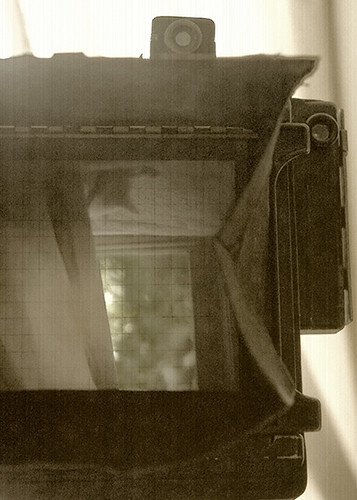
there's a photography "movement" (not really sure a movement is the right thing to call it, but it'll do) called "through the viewfinder" or TTV photography. its premise is that you use an SLR camera (generally digital, but not necessarily) and take a picture of an image as viewed through the viewfinder of a large format camera.

if i had a large format camera, i would show you the set up so that maybe it would make more sense. but here's an old photo from 2004, when the old photography bf had a large format camera and you can kind of get the idea. with TTV photos, however, you generally end up with just the picture of the entire viewfinder, while the rest is cropped out.

notice that the image as viewed through the large format camera is upside down.

i don't have a large format camera, nor do i particularly want one. though they do make impressive display pieces, they are a pain in the ass to dust. and costly to boot. personally, i'd rather have a lens.

so i cheated. i found a set of images on flickr here where someone had taken pictures of a large format viewfinder with nothing in the image, just a blank viewfinder. so i made it into a brush for photoshop and voila! TTV pictures. I messed around with a few shots i already had sitting around on my computer just to see what the effect would be, and i have to say i kind of like it. i could see myself using this in the future.


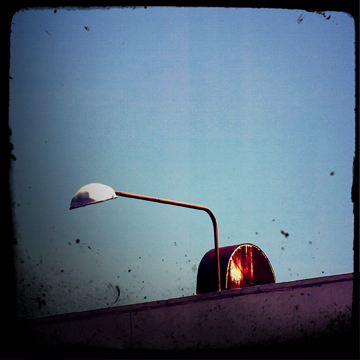
its funny how things don't always turn out how you expected. i thought the above image would work well with the ttv treatment, but its just ok (in my opinion at least)


i used the same ttv brush for all of these, but the flickr set contained several images that could be used to make more brushes. i just haven't gotten around to it yet.

i just thought i would share the sort of thing i like to do when i should be doing something more productive. makes me want to get out there and take some more pictures so i can bulk up my library of images to mess around with though. maybe it will be the encouragement i need...

Wednesday, August 13, 2008

and they call the thing rodeo...

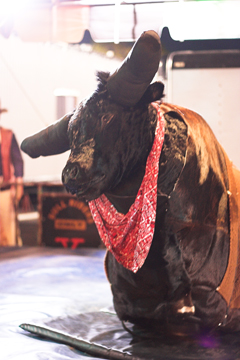
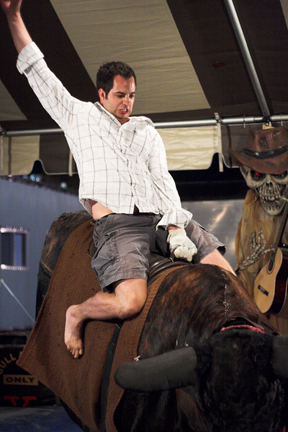
welcome to installment #2 of our fair adventures. this installment stars the dashing Mr. VanBavel and his charming wife Sonja. And me. Oh, and this guy.

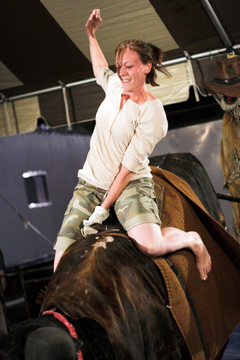
that's right. i can now cross one more thing off my list of things to do before i die (or i can add something to the list, then immediately cross it off. but lets not split hairs, hmm?) last friday i had my first experience riding the mechanical bull. i was not the only one.


Jay clearly wins for having the most convincing facial expressions while riding.


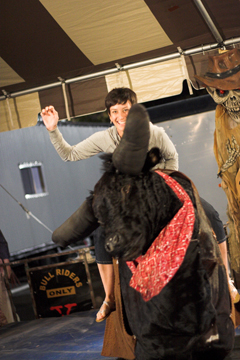
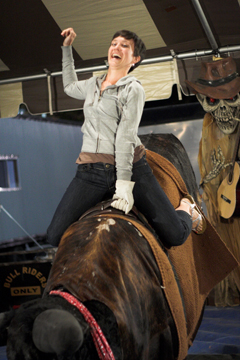
Sonja managed to stay on the full time. I'm convinced this is because she's tiny and cute. The carnival worker that was running the bull would probably have felt like a jerk for throwing her off. He had no such qualms about me.


Though he let me stay on far longer than my bull riding skills warranted, he threw in one last vicious spin that i was unable to survive. He was actually fairly non-creepy considering that he was, in fact, a carnie (carny?). And he was quite good at gaging just how violently to maneuver the bull so that you had to work hard to stay on, but not so much that you flew off immediately.

p.s. i forgot to mention... for only spending maybe three minutes clinging to the back of that thing, i was sore for an awfully long time. you wouldn't believe how wobbly one is after dismounting.

Monday, August 11, 2008

lets all go to the fair...

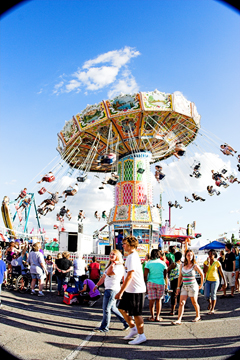
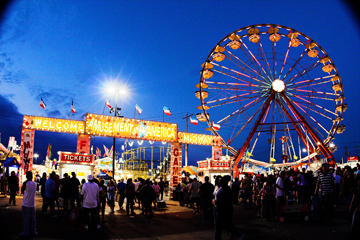
... and take our new lenses along! that's right, i got a new lens. not the super sweet, Canon L glass that i've been drooling over; but let's face it, i don't have a grand to drop on a Canon lens, so instead i got a Sigma. But, its still a nice piece of glass and far more reasonably priced than the Canons. its a f2.8/15mm fisheye and its a lot of fun to play with. so this post is all about pictures.

in which jenny buys some deep fried oreos, purely for research purposes. research tells us that they are delicious. just saying.

the big swings and the ferris wheel are my favorite rides.
both to photograph and to ride.

its angle of view is like 180 degrees or something... its pretty wicked. i could stand right in front of the ferris wheel and get the whole thing in the frame. as long as you're ok with a little distortion that is.


i remembered my tripod, but forgot the plate that has to go on the bottom of the camera to use the tripod. so i didn't get any sweet motion shots. i may use this photo and some from a past fair to in a future photography post, now that i mention it. hmmm....

Sunday, August 10, 2008

63 days and counting...

at long last, another wedding post. not too much going on in that regard recently, as it seems like most things are as done as they can be up until the time comes. in fact, most of the stuff has already been taken up to mr. z's parents' house and stored in the spare bedroom. sister even got the pew bows semi-done well ahead of schedule and is shipping them to the future-in-laws as well where they will be assembled the rest of the way the week beforehand. but there are a few things left cluttering up my empty apartment.

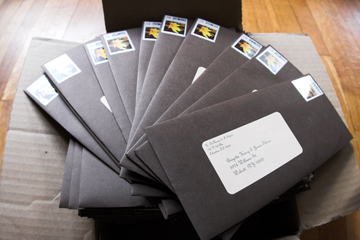
all boxed up and ready to go to the post office

today (according to the countdown on our wedding website) is 63 days out. invites are supposed to go out 6-8 weeks prior to the date, but since we didn't send out save-the-dates, i decided to send them out a bit earlier to give people plenty of time to plan traveling. plus they've been all put together and ready to go for weeks now so i figured i may as well get them out of here.


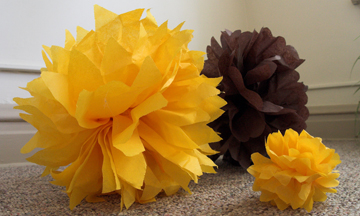
and i did a test run on the tissue paper pom-poms. i found a few different variations on them around the internet, so i tried a couple different things. i think, ultimately, that i like the original Martha Stewart version best. (of course, why would i ever doubt you, oh wise and wonderful Martha). i have these two colors, as well as a light tan and a dark reddish-orange. there are like ten thousand sheets of the yellow, brown, and tan but much less of the red, so i only did test versions of the colors i had plenty of. the original plan was to have them cut out and assembled here and then all we would have to do once we got up to NY would be to fluff them up. i may just wait and do the entire thing the week before the wedding, since Sara will be here to help me. unless i have a burst of productive energy... we'll see


and lastly, i had my dress fitting. Jenny took a handful of pictures, but i'll just post this one. i'm not all that worried about mr. z seeing me in the dress beforehand, but i won't go out of my way to show him either. so this will be a nice compromise. plus the pictures from the front show just how much the waist needs to be let out so that my tummy pudge doesn't show. ;)

Friday, August 8, 2008

biggest pillbox EVER


today was my fourth day at my first rotation. so far i am actually really enjoying it... i guess that's good right? that i enjoy pretending to be a pharmacist, since that is what i plan to do with the rest of my life. this position is actually in a doctor's office, so not your stereotypical retail pharmacist. its a lot different than my usual job interning at CVS.

so far i've mainly been getting a feel for how the clinic runs and getting to know people. and doing a lot of diabetes stuff. we look over charts and review patient's blood glucose logs. the doctor's are surprisingly receptive to our suggestions, though i think part of it is just relief that someone else has already figured out what labs the patients are due for and has summarized their blood glucose logs so the docs don't have to do it themselves. its a clinic that serves low income patients, often with no insurance so the docs are overworked and underpaid. the more work we can take off their hands, the happier they seem.

while i enjoy retail, i do enjoy doing patient education in a doctor's office. the difference could have something to do with the patient populations i work with (low income and uninsured vs. the over privileged and sometimes downright arrogant folks in my retail neighborhood) but in a doctor's office patients seem happy that someone is taking the time to sit down and discuss their diabetes with them and address their concerns, which often the doctors are just too overworked to do. versus at CVS where people just want to get their meds and get on the way the majority of the time. anyway, i just hope that all of my rotations go this smoothly.

and on the topic of medication reviews and counseling... today my preceptor and i were talking about seniors and how easily they can get overwhelmed with all their medications and medical problems in general. and how many people could probably benefit from sitting down with a health care professional... be it pharmacist, nurse, social worker, whomever, and having someone take the time to go over things with them and answer all their questions. which reminded me of my grandmother.

my grandma recently had a heart attack, so of course her medication list skyrocketed. and i got a call from my aunt saying that she was overwhelmed and could i maybe figure out a way to simplify her routine so she wasn't taking a bunch of medications at all different times of day.

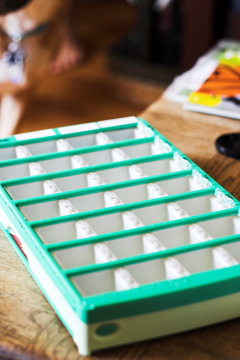
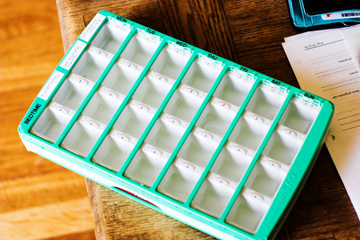
enter the world's largest pill organizer EVER.


on my receipt, it actually rang up as "CVS MegaPill..." and then the rest of the name got cut off. my coworkers mocked me for buying such a gigantic thing. but i thought, by God, i'm going to make it as easy for her as i can. at the beginning of each week, someone can put all her medicines in the right day and time and all she has to do is open the right little door and take whatever is in there. she sent me a very sweet thank you note, and it seems to be working for her so far. i just wonder if it leaves her any counter space...

Thursday, August 7, 2008

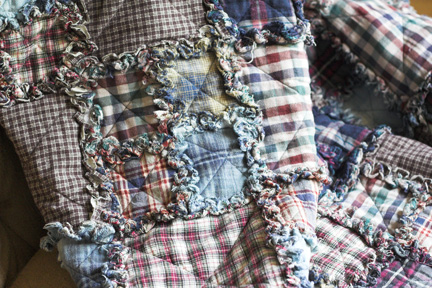
shaggy quilt

i feel like its been a while since i posted a craft project so i though i would share one of my most favorite completed projects. i made this quilt like five years ago, and its still my "go-to" blanket. its all warm and snuggly so its perfect for napping on the couch, and its thick so its also perfect for taking to the park to sit on.


it was my first quilting project, and so far has been my only large scale quilting project. however, i use the term "quilting" in the loosest possible sense. i mean, technically it IS quilted, but its way too easy to be real quilting (a craft which awes and terrifies me at the same time)

here is the basic instructions for a shaggy quilt. there is probably a more official name for these, but it looks shaggy to me. and maybe no one is interested in how to make their own, but just in case, i thought i'd share.

i made a throw that turned out roughly 49" x 63" but you could theoretically adjust the size by adding rows/columns of squares. i'm bad at numbers though, so you'll have to calculate the yardage for different sizes on your own.

start by getting 5/8 yard of 18 different fabrics. i used flannel, which greatly increases the snuggliness factor. you could use whatever you want, provided that it will fray. if finding 18 fabrics you like seems daunting, you could also get 1 and 1/4 yard of 9 fabrics. whatever floats your boat... its your blanket. you'll need a bunch of batting too, and some coordinating thread and such. a walking foot would probably be helpful but i'll be honest, back when i made this i didn't even know what a walking foot was and mine turned out fine so that's up to you.

once you have all your fabric, you will need to cut 64 squares that are 9" x 9" and 248 squares that are 5 & 1/2" x 5 & 1/2." if you don't have a quilter's ruler and rotary cutter, i highly recommend them at this point. the easiest way to do it is to by cutting one 9" strip and two 5 & 1/2" strips from each of the eighteen fabrics and then cut those into squares. (double the number of strips if you are only using 9 fabrics). from the batting you will need 32 squares that are 6 & 3/4" by 6 & 3/4" and 124 squares that are 3 & 1/4" by 3 & 1/4." i'm not going to lie. cutting the squares takes for-freaking-ever.

once you have everything cut, make little sandwiches with your fabric and batting. the fabric should be RIGHT SIDES OUT with the batting in the middle. in other words, lay one square down with the wrong side facing up and center a piece of batting in the middle (use the larger batting squares with the large fabric squares... obviously). then lay a second fabric square on top of the batting with the right side up. pin.

i suggest pinning allllllll of your square sandwiches together and then chain sewing. if you aren't familiar with chain sewing (i wasn't prior to this, but learned quickly) it means that you just sew one piece after another without cutting the thread so that when you are done you have a long chain of pieces that just need cut apart. you will be sewing diagonally from corner to corner, first one way, then the other to make an X. so chain sew them all in one direction, then cut them apart, switch and go the other direction. i marked where i was going to sew with a pencil just to make sure i actually made it to the opposite corner. if you feel brave, feel free to do without. in the end you'll have a little mini quilt that looks a bit like this... (or it would if you were quilting in MSPaint)
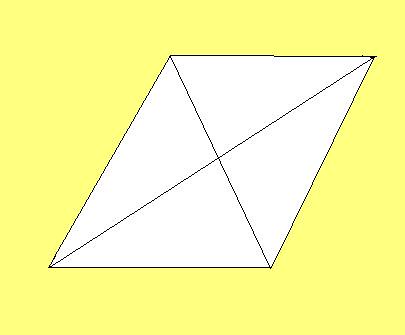
this is apparently an angled view.
not sure why i didn't just make it square...

once all your squares are quilted, its time to put them together. SEAM ALLOWANCES ARE 1"!! you should have 32 large quilted sandwiches and 124 small ones. divide all your little sandwiches up into pairs and pin them together. at this point there isn't really a right or wrong side, so just pin them as you may. chain piece them together so you have 62 pairs sewn together. press or pin your seams open. i know, its a lot of seams... they just keep adding up.

once that's done, pair up your pairs to make a large square consisting of four small ones. when you pin them together, make sure that you put the sides WITHOUT the seam allowances together. you want all your seam allowances on the same side of the quilt.

now you should have 31 large squares made up of smaller squares, and 32 large single squares. at this point, you can lay them all out to be make sure you are happy with the color layout, or you can just wing it and keep sewing shit together. that was my approach and it turned out just fine, but again, its your blanket. it may help to lay them out before you pin them together, just to make sure you've got it right, but whether or not you stress over color placement is up to you.
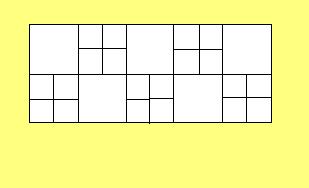
obviously you will have more squares, but MSPaint was proving
too difficult for me. so the example is a mini version.

sew seven squares into a long row of alternating single and composite squares. you should have FIVE rows that begin and end with a single large square and FOUR rows that begin and end with a composite square. sew all of the rows together. try to line up your seams, obviously, but don't stress too much if they aren't perfect. i promise no one will ever notice. and (almost) lastly, sew all the way around the quilt 1" in from the edge. that does it for the sewing part.

at this point, you're probably going to want to take a break. maybe have a drink... not too stiff though, you're going to need to wield a pair of scissors for the next step. now you have to cut the seam allowances into a fringe. make your cuts roughly a half inch apart, but no ones ever going to measure them, so you are free to guess-timate. cut perpendicular to the seam but make sure you don't snip the thread itself. otherwise the quilting police will kill you. or your blocks will come apart. whatever.

The very last step is putting your quilt in the washer/dryer to fray the fringe. this makes for a TON of lint, so i suggest taking to the laundromat if you don't think your washer can handle it.

and you end up with sometime all snuggly and worn-looking. like this.