Monday, June 30, 2008

decisions, decisions...

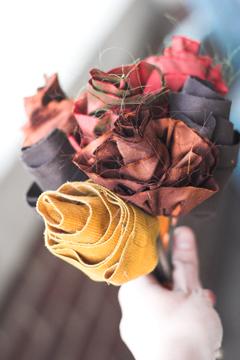
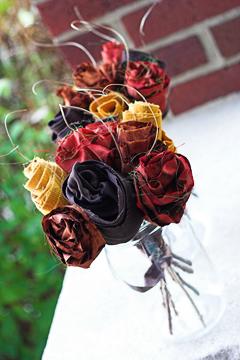
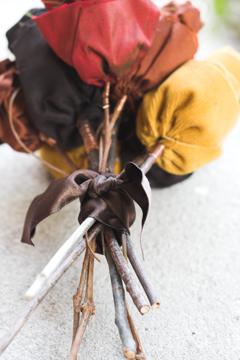
i think i mentioned previously that i had to figure out something to do for boutonnières for both my dad and mr. z's dad. so i made a trek up to JoAnn's and Michael's with Jenny on Saturday. there wasn't any real plan so i kinda just grabbed whatever look fall-ish and appealing and figured it find a way to put it together later.

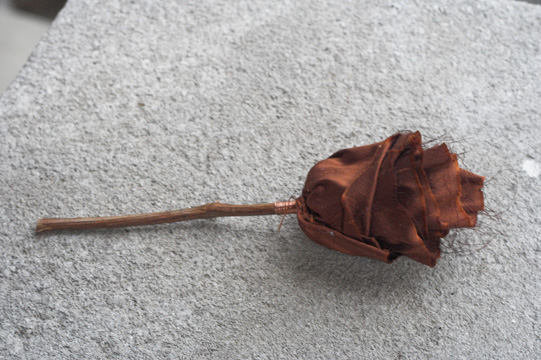
after playing around with everything i'd bought and the vast collection of fall crap i'd managed to put together over the last few months, i came up with a couple of ideas. i also realized that i don't think the rose therussian made for the groom's boutonnière is going to work.

nothing to indicate scale, but its substantially larger than the other options

its just too big. i feel like it needs something additional, but anything big enough to match the scale is going to have to be equally large, thereby making the overall product gigantic. hmph.

in the process of messing around with everything else i came up a couple of possibilities. originally i was going to do a different bout for each dad but now i'm thinking this one for mr. z...


the wheat with the orange looks really good with the dark brown fabric of mr. z's suit. this one's just a mock up. the real one will have a much nicer looking bow.

and one of the following for the dads.

i saw a bout using a pine cone on the wedding style website and it was cute, though rather cumbersome. so i was delighted to find that one of the fall "packs" i got at JoAnn's had wee little pine cones in it. they are quite cute, you know, for a pine cone.


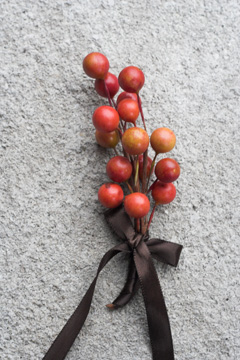
the berries are more orangey-yellow, and a bit less red, than they look here. i'm torn between the two options. i do really like the berries alone, but then i think maybe its a bit plain and needs something. but i think it looks nice with the pine cone too, though here its just smooshed together and sitting on top, not actually arranged to look its best. in this one i did actually make an attempt to make a nice bow, though i haven't trimmed the ends yet.

what do you think? and while i happily take into account the opinions of friends, and even strangers on the web, i know my family is out there (yes, i'm talking to all of you). see right down there where it says "0 comments" or "1 comment" or whatever? just click on it and follow the directions.

Sunday, June 29, 2008

so many crafts, so little time

for once i actually had a hard time deciding what to blog about. true it helps that its been a few days since my last post. knitting, sewing, craft shopping, wedding... about the only thing that wasn't a possibility was the next photography installment, primarily because i haven't done any sample shots for the next topic.

but while we're on the subject, i've only really gotten feedback from one person. if there is anyone that's come here for the photography explanations, i'd love to hear what you think. i'm trying to keep them from getting too bogged down in technical details while still actually explaining how it works. is it too confusing? would you rather have less detail and more tips? more camera specific stuff? i'm open to talking about whatever, really. i do actually plan to talk a little about lighting and composition once i finish with all the exposure stuff, so if that's what you're after, stick around. its coming, i swear.

but anyway, i decided to go with knitting today, both wedding related and not.


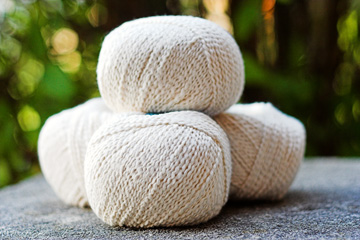
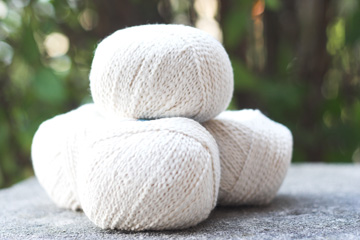
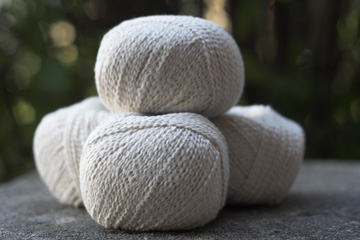
This is Soft Wave, a 100% cotton 1-ply from Queensland Collection. It has sort of a nubbly texture that knits up quite nicely. We shall see how it is to work with. I bought it from Purl's, a really nice little yarn shop in Asheville, NC.

see what i mean by "nubbly?"

We were in town for an evening wedding so we had all morning to kill. My mom and I left Mr. Z and my dad on a bench in the sunshine while we wandered around petting the yarns and chatting with the woman who ran the store. There really is something magical about sticking your hands into giant piles of soft fluffy yarns in all the colors of the rainbow. i have a special thing for teals and greens. but this time i refrained, and in the end only bought this (albeit 10 skeins of it) for a very special project.

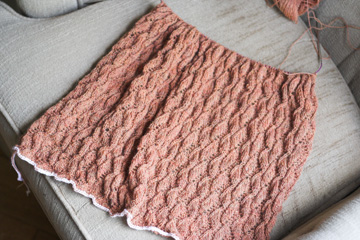
and this, of course, is the fourth and final wrap... just in case the orange didn't give it away.

not my most artistic photo,
but in progress shots are hard to make pretty


the Cheshire Stole, while pretty, just didn't keep me interested. So, while at Purl's I also found a pattern for Fiber Trend's Estonian Lullaby Blanket. I modified the stitch count to make it into a wrap, which consists of making it narrower and longer, and so far its worked out nicely. I think the stitch pattern fits better with previous wraps as well. It does have a knitted border on both ends though, which meant that I had to learn a new trick and do a provisional cast on. hopefully that doesn't bite me in the ass when i try to take it out later.

i will say i am surprised that i don't hate this yarn, or lace knitting, yet. i'll be glad when i'm done, but i really enjoy the lace. and luckily this one is knitting up really quickly. that may have something to do with the fact that i have watched the entire first season of Lost over a matter of days. you can get a lot of knitting done watching 17 episodes of anything. i have to admit though, i'm a little bit in love with Charlie... in spite of the heroin addiction. oh wait, what?? he's not real? damn.

Wednesday, June 25, 2008

Photography nitty gritty #4: Aperture Part II

So we ended last time saying that you can't just run around changing your aperture willy-nilly. Well, I mean, you can... its your camera, you can do whatever the heck you want. but if you're going for a certain look, you can't. Why not? Because, aperture controls the "depth-of-field" in a photograph, and along with that, the bokeh.

Depth-of-field (or DoF from here on out) refers to how much of the photograph is in focus. When you focus on a certain object or area, there is a range both in front of and behind that point of focus that remains sharp. Your camera can only technically focus at one distance, and from there the sharpness fades into blurriness, both in front of and behind that point. How quickly it fades into blurriness is controlled by the aperture.

Very wide apertures (again, small number/large opening) have a narrow DoF. That means that when you focus on a single point there will only be a short distance in front of and behind that which will remain in focus. for example, with an aperture of 2.0 i can focus on kodiak's eyes and while they will be sharply in focus, his nose will be blurry.

Very small apertures have a much wider DoF. With an aperture of f/22, if i focus on kodiak's eyes, his nose will certainly be in focus. so will the fence behind him and probably the hospital across the street.

Not making any sense? How about a visual?

Let's start with f 2.0; this is a wide aperture and therefore a narrow depth of field


first we focus on Ms. Scarlet here in the front. as you can see, Mrs. Peacock is blurry, and Col. Mustard is blurrier yet. That's because the focus is in the front, and the subjects get blurrier the farther they are from the plane of focus.


now, if we focus on Mrs. Peacock, the focus is in the center and both Ms. Scarlet and Col. Mustard are equally blurry as they are both equal distance from the plane of focus. (more or less, i didn't bother with the ruler)
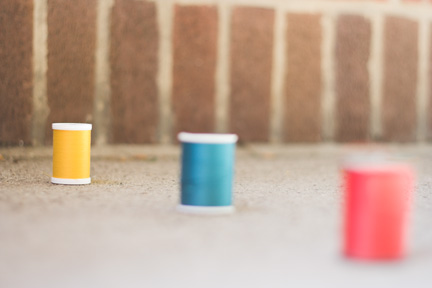

and lastly, focusing on Col. Mustard gives us the exact opposite of the first photo. In this case, Ms. Scarlet is the blurriest since she is the farthest from the plane of focus.

Now lets look at a small aperture, f 22, which gives us a much wider DoF.

focused on Mrs. Peacock
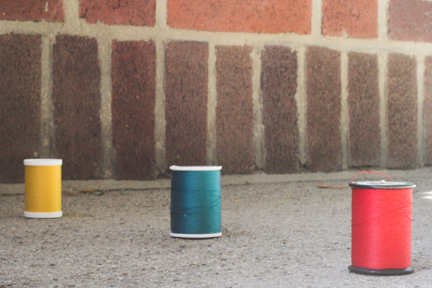
focused on Ms. Scarlet
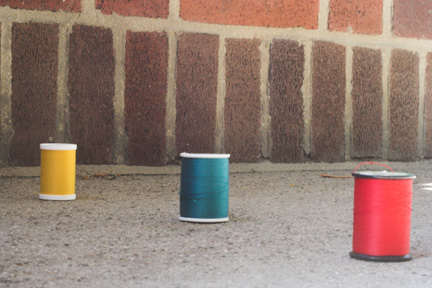
focused on Col. Mustard

As you can see, it doesn't really matter who I focused on. At such a small aperture, all three of them are in focus, regardless of where the actual plane of focus was.

Your depth of field is also determined by how far away you are from whatever you focused on. in the following two images, Col. Mustard remained in the same place, only the camera moved. the aperture was f 2.0 for both pictures.

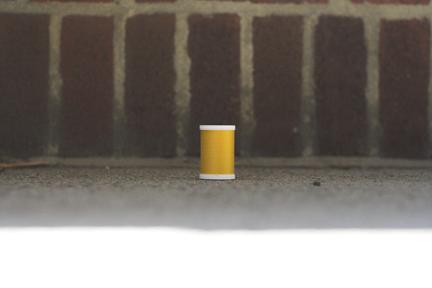
Notice in the first picture that the brick in the background, while still recognizable, is pretty blurry. In the second picture, even though the distance between the wall and Col. Mustard hasn't changed, the brick is much clearer. This is because in the first picture the two distances are almost equal, whereas in the second picture the wall is much closer to the Col. than the camera was.

So depth-of-field refers to how much of the image is in focus. what about the part that's not in focus? that, my friends, is bokeh. and that is my favorite part of photography. bokeh is that beautiful blurry background you get with a wide aperture.
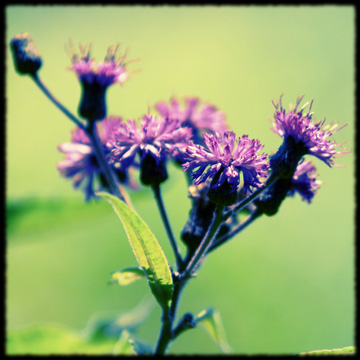

the area behind this flower was all sorts of bushes, grasses, and plants. had i used a smaller aperture, it would have been visible and very distracting. but by opening up to a wider aperture, it all blurred out into a soft, green haze.

the point...

if you're wondering what all this means to you, here's how to apply it to your pictures.
  • if you want a nice blurry background, you need a wider aperture
  • for more blur, move your subject farther away from whatever is in the background and move closer to your subject.
  • if you are taking a picture of two kids (for example) and one is sitting slightly in front of the other, you may need to stop down a little bit (one or two f-stops) so that both subjects are in focus.

um, yeah. that's all i can think of to say about aperture and DoF for now. Here's something to ponder until next time. If you think you know the answer, feel free to chime in. What if you have decided an aperture of f 2.8 gets you the nice blurry background you want when taking pictures of your little one(s), but your exposure meter says that such a wide aperture will cause your picture to be terribly overexposed. What to do?

p.s. Canon, don't forget to send me that 24-70mm L lens to review. Canon? Can you hear me??

Proceed to #5 Shutter Speed and Motion Blur

Tuesday, June 24, 2008

my hero, therussian

my flowers came today. yippee!! i could talk about them, but lets just look at pretty pictures.


bridesmaid bouquet as delivered

curli-cue stick thingies added and stems tied with brown ribbon
they are currently in mason jars to keep them upright so they don't get smashed.
they will be displayed in a similar fashion at the reception


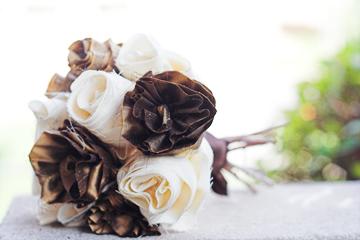
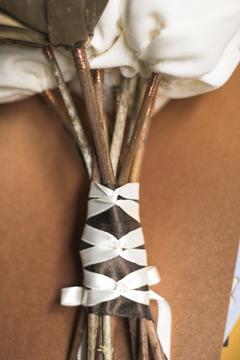
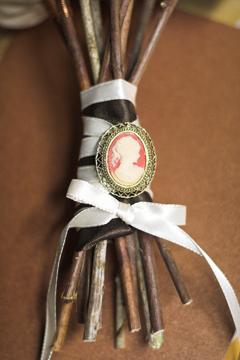
my bouquet, champagne and ivory


back of stems

front of stems, with grandma's cameo. ribbon tails are about 12in.

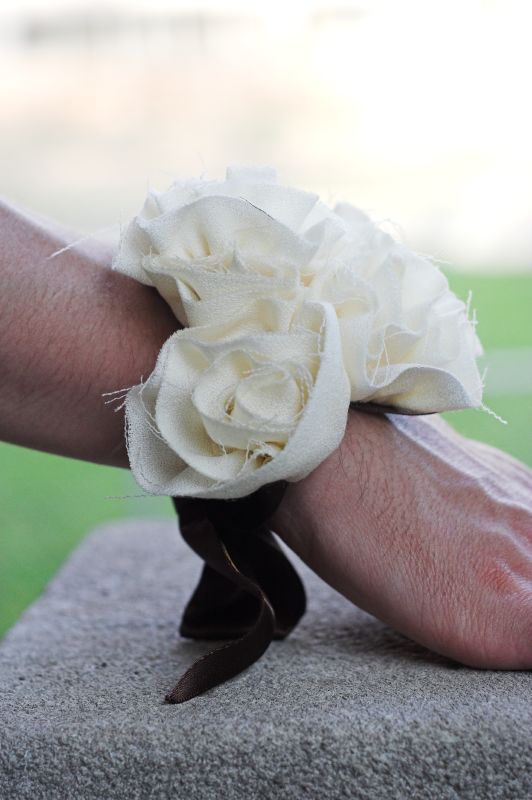
there are two corsages, one ivory and one champagne for the moms
the champagne one is almost identical. a bit large but very pretty.
they are tied on with wide chocolate-y brown ribbon
(don't mind mr. z's man hands doing the modeling)


the roses are the handiwork of therussian, on etsy. she was a delight to work with, super helpful and almost as excited about my flowers as i was. if anyone wanders here in the search for alternative bouquets, i would definitely recommend her.

there's another photography post in the works with even more confusing aperture stuff. i know it seems complex but i promise, once we get through it all and you see how it all comes together, its totally worth the confusion. hopefully i get that up in the next day or two.

Monday, June 23, 2008

Photography nitty gritty #3: Aperture Part I

Before we get into the photography, there's a few other bits of housekeeping to discuss.

First of all, I am delighted to be the recipient of a Sunday Shout-out by Meghan of AllMediocre.com. If you haven't checked out AllMediocre, you should. Its a collection of lots of entertaining blogs by regular folks who are pretty funny. Tons of good stuff there. Secondly, if you made it here from Meghan's link, thanks for stopping by. The links to earlier posts in the photography series are over to the side there. feel free to say hi and ask questions if you're curious. if you're just reading for the first time, this series of posts is aimed at folks who got tired of crummy shots from their digital point-and-shoots and bought nice digital dslr's only to find out they have no idea what most of the buttons on their new camera do.

and lastly, since some people seem to have had some luck begging for cameras online, Canon... if you're listening i'd LOVE to tell anyone reading this blog how wonderful my new 24-70L glass is. Feel free to send it to me at any time. mkay, thanks.

Aperture

Ok, so we said there were three components that could be manipulated to control exposure. I wavered back and forth for a while trying to decide on which one to start with, but in the end decided on aperture, mainly because i'd already taken the demonstration pictures. And aperture can be the most confusing (at least it was for me) so you can chew on this one for a while without everything else already clouding things up.

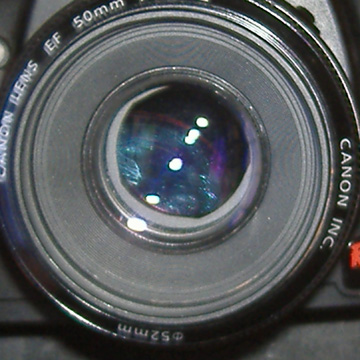
The shutter is the part of the camera lens that opens and closes when you take a picture. Aperture (also known as f-stop) refers to how large, or small, that opening is. It is indicated by a number, often preceded by the letter f. for example f2.8 or f16. To demonstrate what it is, do this... Put your camera on aperture-priority (dust off the manual if you need to) and set your aperture to the lowest number you can. My 50mm goes down to 1.8... 3.0 is fine, so is 5.6. whatever.

Now, hold it out in front of you so you are looking into the lens. Like you're going to do that thing where you hold the camera out with the lens facing you, to take a self-portrait . Then press the shutter button and watch what happens inside the lens. did you see the shutter close? notice the size of the opening in the center. now change your aperture to the highest number it will go to, most likely 22. do the same thing. see the difference??

i used to know what the aperture actually was. its not really important so i forgot it... it has something to do with the diameter of that opening and how it relates to the focal length of the lens, in other words "math stuff." not important. what is important to know is that the smaller the number, the bigger the opening is. for instance, when you looked in your lens, the opening at f3.5 (or f5.6) should have been significantly bigger than it was at f22. right? remember that... it will make things easier later. just in case you didn't do the experiment, this is what it would have looked like.

f 2.0

f 5.6

f 22

So how does that relate to exposure?? Light. If all other setting remain the same, a larger aperture (i.e. bigger opening but SMALLER number) will let in more light than a smaller aperture (i.e. smaller opening but bigger number). so if your camera is set to automatic and its a very bright sunny day, your camera will likely choose a smaller aperture. think about it... lots of light means risk of over exposure. to cut down the light getting in, we make a smaller opening. this is called "stopping down." think of it like your eye. in very dim lighting your eye dilates (to approximately f2.3) and in bright daylight in constricts, or stops down, if you will.

time out... are you thoroughly confused yet? feel free to ask for clarification because it only gets murkier from here.

So why change your aperture? Why not just let the camera pick whatever aperture it thinks is right for the lighting situation? Because changing the aperture has a huge impact on the final result of your picture. Aperture influences how much of the picture is in focus, and how much is out of focus. This is called depth-of-field. We'll save that for next time, so as not to overwhelm...

Continue to Part 4: More aperture

Sunday, June 22, 2008

Wedding things

The wedding plans continue to come together nicely, with only two bridezilla moments thus far (one i think was justified, the other probably less so). We've booked a room at the Carriage House Inn B&B for us to stay in and for the bridal party to get ready in. The original plan had been to stay at mr. z's parents and get ready there, then stay at the hotel with everyone else the night of... until we realized just how many people were already going to be at his parents' house. we decided that it was probably unreasonable to expect that many people in one house without some sort of disaster, so the B&B it was. i think it's a good move, as the inn is very pretty and still quite close to the ceremony location.

We also ordered some matchbooks to go with the sparklers. if you are looking for cheap favors, i'm telling you... $28 for 100. i love cheap shit. and even more importantly, the flower gal shipped my bouquets on friday. huzzah!! she sounds almost as excited about them as me, which is promising. i did just realize that we probably need bouts for the dads, but i think i may put something together sans flowers. will have to trek to JoAnn's (oh darn) to see what they have.

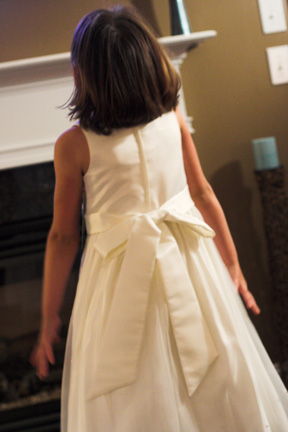
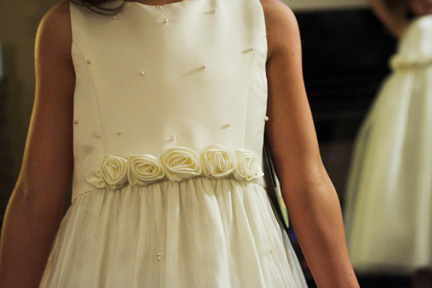
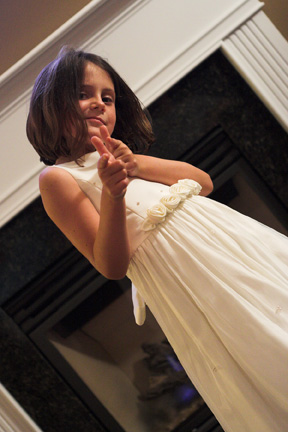
but more importantly, thing 1 and thing 2 are my flower girls. and let me just say, they are the cutest flower girls ever. sister-in-law, who is a most excellent shopper, found the perfect dresses. and the girls were quite happy to model them for us while we were visiting.

the front

the back

detail

who doesn't love a flower girl giving the finger guns??


coloring is a bit wonky as it was inside in the evening so there was no natural light to be had. they are a really pretty ivory fabric with pearly type beads scattered around it. super cute.

Thursday, June 19, 2008

Photography nitty gritty #2: Exposure

Let's talk about light. Why? Because I said so. Well, that and because its kind of crucial to the whole photography thing. In fact, its pretty much all photography is when you get down to the most basic concept of it. A picture is a recording of whatever light you let into the camera. the amount of light recorded is controlled by the combination of 3 different.

#1 aperture - this is how big the opening in your lens is when you take the picture. a larger opening means more light enters the camera and a smaller opening means less light gets in.

#2 shutter speed - this is how long that opening stays open. a long shutter speed lets in more light that a shorter shutter speed.

#3 ISO setting - this does not affect how much light gets into the camera, but rather how quickly the film (or sensor in the case of digital) records what light does get in. A higher ISO indicates more sensitivity to light and therefore a faster response.

That's a very basic definition of those, and i'll go into each of them on their own after this. understanding the relationship between each of those is really the key to being able to work your camera.

but back to light and your exposure meter, the goal is to get a properly exposed picture, i.e. just the right amount of light. its a little reminiscent of goldilocks and the three bears...

this picture is too dark


this one is too light


and in theory, this one should be just right as it was dead in the middle of the exposure meter. but as you can see, its still a bit dark.


which leads me to my first "rule" of photography, which is know how to use your light meter, but don't rely on it. my camera generally tends to shoot a little on the dark side if left to its own devices. for that reason, and the fact that i like my photos kind of bright, i tend to adjust my settings so that my camera says the picture will be slightly overexposed, but in reality it comes out just about right.

like this... part way between image #2 and image #3.


the previous three images were straight out of the camera.
this one, however, has been edited because i was going to use it
in a knitting post. but i did not edit the exposure, only the coloring.

so, how do you read your exposure meter? well you have to know where it is, for one thing. generally you can see it at the bottom when you look through the viewfinder. on my camera, you can also see it on the small screen above the image previewing screen.

it looks like a row of dashes with a +1 and +2 to the right and a -1 and -2 to the left. there should be an indicator that moves back and forth depending on your settings. A positive number means the picture will be over exposed and a negative number means it will be under exposed. The first picture above was taken at -2, the second at +2, and the third was right in the middle, where my camera thought the exposure was just right. the last picture was taken a few dashes above the center, but not quite to +1.

ok, so now you know what it says, but what are you supposed to do with it??

if you are in fully automatic mode (green rectangle)... you shouldn't be. you can't control anything. if you are in Program mode (P) you have slightly more control. in this mode, and any of the program modes, you can choose how you want the picture to expose and the camera will pick the shutter speed and aperture to achieve that exposure. you shouldn't be using these either, but i'll let it slide for now. :)

shutter (and aperture) priority are one step closer to fully manual. we haven't really talked about aperture and shutter speed yet, so these will make more sense later. but in these modes, you pick the shutter speed (or aperture) you want and the camera will set the other to achieve the proper exposure. again, in these modes, you can adjust the exposure compensation so that you get the exposure you want, not just what the camera thinks is right.

i use aperture priority a lot because i don't care so much what my shutter speeds are usually, unless the light is dim and i'm concerned about it being too long. so my thought process might go something like this...
  • there is plenty of light so i know i don't have to worry about what my shutter speed is
  • my camera shoots dark so i will change the exposure compensation to two dashes to the right of center
  • i want a nice blurry background so i pick a wide aperture (this will make sense later... promise)
  • then the camera picks whatever shutter speed it needs so that the combo of aperture and shutter speed give the exposure i picked
you can't change the exposure compensation in all-out manual mode. in this case, you pick all the settings and your exposure meter tells you what exposure that combination will result in. then you can adjust your settings until it indicates that you will get the exposure you want.

if you aren't sure what the right exposure is, you can do what's called exposure bracketing. this was especially useful in film days when you weren't sure what you got until later. to bracket the exposure, you would take the same picture changing the exposure compensation each time. for example, you might take one at -1, -1/2, 0, +1/2, and +1 and then compare them afterwards and pick whichever one looks the best.

remember, its really hard to rescue a poorly exposed photo through post processing. and it rarely turns out as well as one that was exposed right in the first place. so its really important to get it right.

Continue to Part 3: Aperture

Thing 1 and Thing 2

remember Thing 1 and Thing 2 from The Cat in the Hat? they come in with the cat and wreak havoc in the house?? i think its an appropriate reference in this case ;)

its been a while since i've posted, and i actually have quite a bit to blog about. there's sewing, and knitting, some wedding goodies, and even another photography installment. but its late and i'm tired.

mr. z and i spent the weekend in asheville at my cousin's wedding. it was a fun little town, and the wedding was beautiful. better still, we got to spend a few more days in the sunny south, visiting my brother's family. we had a really good time, and it was great to see the girls. i swear, they get cuter every time i see them, which is not often enough. since i'm too lazy to go into the details, here are some pictures of the cutest girls ever (no really, they are.)

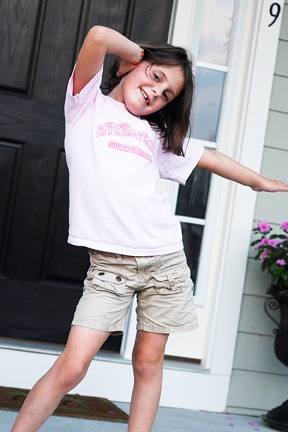
Thing 1 is six. I'm told she looks just like I did at that age. If that's the case, she pulls the bob off WAY better than i did back then. She likes to ham it up for the camera.


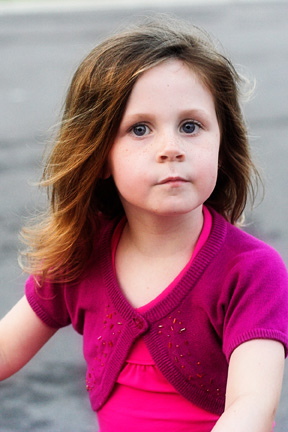
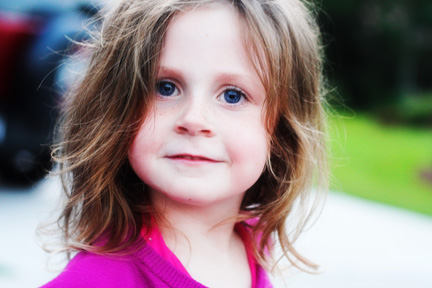
Thing 2 is four, but its hard to remember that because she's as big as thing 1. When you first take her picture, she makes a forced smile that is remarkably like her dad's. but if you keep the camera on her long enough, she goes back to a natural expression.


i'll be honest, i didn't take the one above. Thing 1 took it.
Thing 1 was snapping pictures and Thing 2 was striking poses left and right.
Too cute for words.


shooting these reminded me how much fun it is to take pictures of kids. it would be awesome to be able to do that. my sister-in-law knows this gal, and i have to say i am jealous. she's self-taught and takes great pictures of kids. and she was brave enough to start a business of it. i would love to do that. i think you have to have more in your portfolio than tons of pictures of the same kids over and over though, even if they are adorable.

anybody in columbus have some kids they are willing to let me follow around with a camera?

Thursday, June 12, 2008

quilted coasters

the project in which my sewing machine got cranky and spewed pieces at me. then promptly stopped working. permanently.


i am a collector of pretty things. i love craft books with pretty pictures and patterns. i collect them, with the intent to make pretty things, but end up with far more patterns than any one person could every make (except maybe jenny, who is the most prolific crafter i have ever seen)

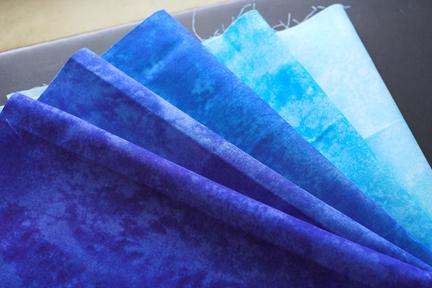
but its not just books, its yarns and fabrics too. right now my yarn stash far outweighs my fabric stash, but i have collected a considerable stack of fat quarters recently. this fabric came all bundled up, a stack of blue batik-y fabrics all folded and tied with a pretty blue ribbon. seriously, whoever the person is that thought "lets bundle up all these scraps and tie them together and see if we can convince people to buy them" was a GENIUS. or i'm a sucker. whatever.


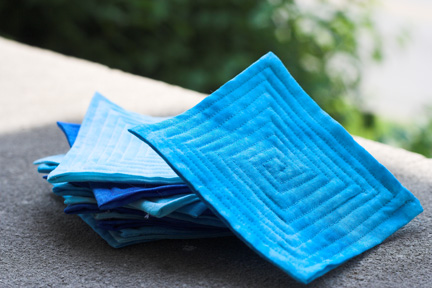
these coasters are a super quick and easy pattern from Last Minute Patchwork + Quilted Gifts. there are five colors, and i got five coasters out of each. so if any one wants some blue coasters, let me know. i've got a bazillion. I've also got some more neutral fabrics in browns, yellows, and greens that will better match our decor. i thought these would make a good practice set, but as it turns out, they're so easy that even the practice ones are pretty nice.


on the topic of my sewing machine, my four year old low-end brother machine bit the dust. it all happened so fast, but i think the foot caught and bent (or something) and all i know is the needle hit something it wasn't supposed to and it snapped it half and several integral bits that attach both foot and needle to the machine went skittering off under various pieces of furniture. i could probably be repaired, but for more than i paid for the machine. so dr. z went and got me a new machine today... what an awesome guy, eh? went all by himself to get a sewing machine.

Tuesday, June 10, 2008

goodbye philodendron,

its been fun.

i don't have a green thumb, in fact i typically kill most plants immediately upon taking them out of the greenhouse from which i purchased them. having mr. z around (actually i guess that's dr. Z now since he graduated this weekend, but that's another post) seems to help though, mainly because he actually remembers to water them.

however, when my parents packed up everything in my childhood home and moved across the country last november, my mom gave me all her plants. my mom does have a green thumb, very green. i swear the woman can grow anything. but that's not the point. the point is, she gave me several large, luscious, beautiful plants of various types. one of which we think was a philodendron of some sort. surprisingly, all of these inherited plants have fared very well. they were big, and green, and they made my apartment look nicer. notice the past tense...

but before we get to the tragic fate of the philodendron, let me introduce you to kodiak. kodiak is an integral player in the story of the philodendron (i just like that word. it sounds smart).


this is one of my adorably infuriating fur-kids. i have to admit, he is my favorite. not that i don't love nizhoni to pieces, but kodi is a mama's boy. i wonder sometimes if its like that when you have real, human children. sure you tell them you love them all the same, but do you really have one you like a little bit more than the rest? i like to think this is true because it allows me to believe that i'm the favorite in my family. (just kidding, mom)

anyway, that's kodiak. handsome, isn't he? last weekend kodiak had an upset tummy. at roughly 3:30am on saturday. i woke up to find him hacking and heaving, as though he were preparing to throw up all over my bedroom floor. being the concerned dog-parent that i am, i opened up the bedroom door, figuring at least if he yacked, he should do it downstairs on the wood floor where it would be easier to clean up than it would be on the carpet. then i went back to sleep.

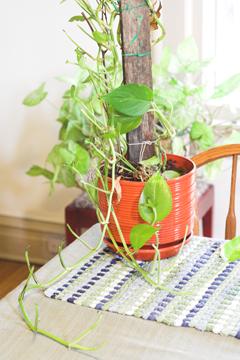
you know how they say dogs eat grass to calm their stomachs? apparently in a pinch, they'll eat whatever green thing they can find. including every single leaf off a rather large, prolific philodendron.


prior to this weekend, this plant was so lush, you couldn't even see that board that held it up. and notice the long bare tendril in the front here, where every last leaf is gone. *sigh*
Monday, June 9, 2008

Photography #1: Some basics

Let's just keep in mind that I'm not an expert, just trying to help make sense of all the buttons and gadgets on DSLR's for those that have them but aren't sure how to use them. If any visitors here are experts, feel free to chime in and comment.

That said, here we go...


DSLR vs. Point and Shoot


DSLR stands for digital single lens reflex. I'm going to assume you all know what digital means. Single lens reflex means that when you look through the viewfinder, you are actually looking through the lens, via a system of mirrors. Allowing you to look directly through the lens means you can see the effect of changing the lens. When you push the shutter button, the mirror flips up and out of the way, which is why the viewfinder goes black if you're looking through it when you push the button.


In a point and shoot camera, the viewfinder actually “sees” through a separate lens than the one that takes the picture, so what you see through the viewfinder may not actually line up exactly what you get in the picture. Which can be frustrating if you've carefully framed something (i.e. Lined it up carefully in your shot) Point and shoots don't typically (though some do) have interchangeable lenses. And many of them have the infuriating delay between when you push the button and when it actually takes the picture.

Focal length

In an attempt to figure out how to say what i wanted to say here, i looked up focal length on wikipedia. it had math in it. it made me want to curl up in the fetal position and cry, but for your sake i persevered. lets just say that focal length describes the "angle of view" or how much of whats in front of you is in the picture. its also used to describe the lens itself sometimes. as in, "where the hell did i put my 50mm?!"

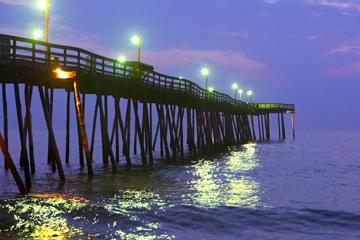
there are fixed focal length lenses, such as a 50mm or 300mm lens; and zoom lenses, which means you can move it through a range of focal lengths, such as a 24-70mm or 70-200mm lens. the shorter the focal length, the wider the angle of view. the longer the focal length, the more magnified and closer things seem.


18mm: (notice how the waterline seems to arc)


70mm(ish... i don't have the exact settings documented)

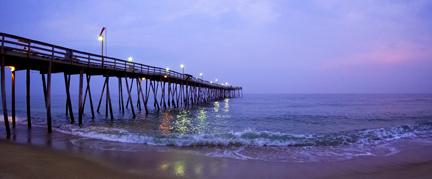
one of the piers in the Outer Banks


Types of lenses

I've already mentioned fixed focal length and zoom lenses. But there are a few other descriptors of lenses that you may hear mentioned so we'll just define them (very basically) here.

  • Macro (also called Micro by some companies): A macro or micro lens has a longer barrel that allows for you to focus the camera more closely to the subject than you could with a normal lens of the same focal length. A macro lens can be pretty much any focal length. It allows you to magnify your image as compared to what it would be with a non-macro lens of equivalent focal length.

in addition to being a type of lens, and a genre of photography, this is also a setting on a lot of point and shoot cameras. It is usually indicated by a little tulip icon. [Sidenote: There have probably been times when you have been trying to take a picture of something with the lens of the camera very close to the object and your camera wouldn't focus... probably made you want the throw the camera, no? Well, try changing your camera to macro mode... it may help]

  • Telephoto: these are lenses with long focal lengths that let you get pictures of things that are far(ther) away. like a telescope.
  • Wide-angle: these are lenses with very short focal lengths that allow for a very wide view. The wider the angle, the more distorted the image gets, like the curve of the waterline above.
  • Fish-eye: this is a wide angle lens that distorts the image so that it appears to bulge very obviously, circularly.
How's that? Clear as mud?? just wait... we're just getting started. none of this really has anything to do with taking a good picture, but its good to know the terminology when you hear it.

Continue to Part 2: Exposure

Saturday, June 7, 2008

class is in session

here's the deal... i've started writing up various parts of the photography tutorial, i think it will go something like this:
  • some camera and lens basics
  • exposure and how to control it
  • breaking the components of exposure down
  • how to manipulate the settings to get what you want
  • lighting
  • focusing and composure
at least, that seems like the best way to break it down into manageable components at the moment. if there's anything else you want me to address, or something you still don't get at the end, we can always add on. just let me know what you want to hear.


p.s. your homework assignment, if you actually have a big shiny camera (i'm talking to you anymommy... muahaha) is to figure out where your exposure meter is.

Thursday, June 5, 2008

what wedding?

see the new title box up there? (its pretty, no?) it says that this blog is about knitting AND wedding planning. but i haven't blogged about the wedding stuff in quite some time, aside from the wraps which are more knitting than wedding really.

there was lots of wedding blogging over christmas break, when i had the luxury of spare time. but then school started up again and i kissed all my spare time goodbye. but never again!! yesterday i took my last college final EVER. nine years after graduating from high school, i finished up my last quarter of classes. i don't actually graduate until next spring, because our program consists a final year of full time internships for our last year. but no more classes! w00t!!

i've already gotten back to working on wedding goodies. Today i numbered all the RSVP cards and put stamps on them, then put together all the envelopes. we're still in the process of collecting all the addresses, and the invites aren't actually going out til mid-julyish but i'm neurotic so i couldn't stop myself.

must say, they are a bit bigger than expected.
its a good thing we went with the smallest size stamp!


we ordered the stamps from zazzle.com. there's a bit of a markup from just getting stamps at the post office, but there are no good $0.27 stamps. and i refuse to put a panther on my wedding rsvps. call me a bride-zilla if you must, its just not happening. so we got both stamps for the rsvp's and for the envelopes. the photo on the stamps is one of mine from highbanks park in the fall a few years ago.


this is a shot of everything getting ready to be stuffed in the envelopes. i love my invitations. i think i said this when i posted them before, but they ran us about a total of $250 for 110 invites (not counting the postage). we designed them and put them all together ourselves. they make me happy :)

other things on the agenda for my new school-free life...
1. paying it forward projects
2. sewing projects and mending that's piling up in the basement
3. knitting, knitting, and more knitting.

Also, i think i will work on writing up the photography bit. i'm not sure when it will be posted, but i will probably break it up into a series of posts to make it a little more manageable. so stay tuned.