#1 aperture - this is how big the opening in your lens is when you take the picture. a larger opening means more light enters the camera and a smaller opening means less light gets in.
#2 shutter speed - this is how long that opening stays open. a long shutter speed lets in more light that a shorter shutter speed.
#3 ISO setting - this does not affect how much light gets into the camera, but rather how quickly the film (or sensor in the case of digital) records what light does get in. A higher ISO indicates more sensitivity to light and therefore a faster response.
That's a very basic definition of those, and i'll go into each of them on their own after this. understanding the relationship between each of those is really the key to being able to work your camera.
but back to light and your exposure meter, the goal is to get a properly exposed picture, i.e. just the right amount of light. its a little reminiscent of goldilocks and the three bears...
this picture is too dark

this one is too light
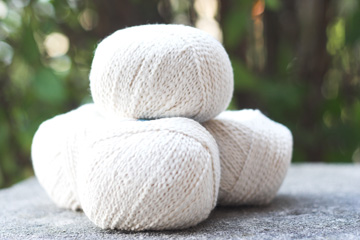
and in theory, this one should be just right as it was dead in the middle of the exposure meter. but as you can see, its still a bit dark.
which leads me to my first "rule" of photography, which is know how to use your light meter, but don't rely on it. my camera generally tends to shoot a little on the dark side if left to its own devices. for that reason, and the fact that i like my photos kind of bright, i tend to adjust my settings so that my camera says the picture will be slightly overexposed, but in reality it comes out just about right.
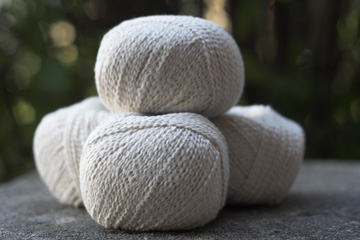
like this... part way between image #2 and image #3.

the previous three images were straight out of the camera.
this one, however, has been edited because i was going to use it
in a knitting post. but i did not edit the exposure, only the coloring.
so, how do you read your exposure meter? well you have to know where it is, for one thing. generally you can see it at the bottom when you look through the viewfinder. on my camera, you can also see it on the small screen above the image previewing screen.
it looks like a row of dashes with a +1 and +2 to the right and a -1 and -2 to the left. there should be an indicator that moves back and forth depending on your settings. A positive number means the picture will be over exposed and a negative number means it will be under exposed. The first picture above was taken at -2, the second at +2, and the third was right in the middle, where my camera thought the exposure was just right. the last picture was taken a few dashes above the center, but not quite to +1.
ok, so now you know what it says, but what are you supposed to do with it??
if you are in fully automatic mode (green rectangle)... you shouldn't be. you can't control anything. if you are in Program mode (P) you have slightly more control. in this mode, and any of the program modes, you can choose how you want the picture to expose and the camera will pick the shutter speed and aperture to achieve that exposure. you shouldn't be using these either, but i'll let it slide for now. :)
shutter (and aperture) priority are one step closer to fully manual. we haven't really talked about aperture and shutter speed yet, so these will make more sense later. but in these modes, you pick the shutter speed (or aperture) you want and the camera will set the other to achieve the proper exposure. again, in these modes, you can adjust the exposure compensation so that you get the exposure you want, not just what the camera thinks is right.
i use aperture priority a lot because i don't care so much what my shutter speeds are usually, unless the light is dim and i'm concerned about it being too long. so my thought process might go something like this...
- there is plenty of light so i know i don't have to worry about what my shutter speed is
- my camera shoots dark so i will change the exposure compensation to two dashes to the right of center
- i want a nice blurry background so i pick a wide aperture (this will make sense later... promise)
- then the camera picks whatever shutter speed it needs so that the combo of aperture and shutter speed give the exposure i picked
if you aren't sure what the right exposure is, you can do what's called exposure bracketing. this was especially useful in film days when you weren't sure what you got until later. to bracket the exposure, you would take the same picture changing the exposure compensation each time. for example, you might take one at -1, -1/2, 0, +1/2, and +1 and then compare them afterwards and pick whichever one looks the best.
remember, its really hard to rescue a poorly exposed photo through post processing. and it rarely turns out as well as one that was exposed right in the first place. so its really important to get it right.
Continue to Part 3: Aperture
1 comment:
Ok, I'm sitting here reading your posts on photography and fiddling with my camera...
I'm digging the tips - I'll be reading through more of them!
Post a Comment